03 Jan Email Signing (continued)
A deeper look at Email Signing
There are two approaches for email signing. There is a method referred to as PGP (Pretty Good Privacy) and another method called S/MIME. To keep things simple, we’re going to use the S/MIME method for our project today. This is going to be a bit on the advanced side, so if you count yourself as a computer wiz, continue on. The instructions are easy to follow, so if you have a little time just follow step by step. We’re going to make your email client ( e.g. Outlook ) learn to use your certificate to sign and/or encrypt your emails. Let’s get started…
Getting the Certificate
To get your certificate, there is (luckily) a free provider online. Comodo has long been a trusted source of certificates and other security needs. They offer a free personal certificate on their website. Here are the steps to get your certificate installed:
- Get Firefox – For the sake of simplicity, you must use Firefox for getting your certificate. They have a great new browser you can try, it’s called Quantum
- Go to Comodo and get your certificate. Fill out the form, wait a few minutes, and your certificate will be emailed to you
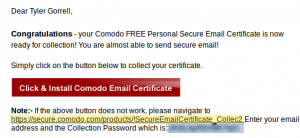
- Once you receive the email from Comodo, you’ll need to open the link they send to you (see yellow highlight below) in Firefox. Copy the password given in the email (highlighted in blue below). Be doubly sure to use Firefox for this step
- After you’ve loaded the link in Firefox, enter your information into the form, pasting the password from the email into the form

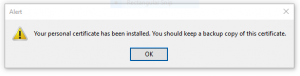
- You should see a pop up window saying your certificate has been installed
- We now have to export the certificate to a file, so we can use it elsewhere. In Firefox, click on the three lines in the top right hand corner, then click Options.
- In the next window, click Privacy and Security, and scroll to the very bottom of the page
- Click the View Certificates button at the bottom
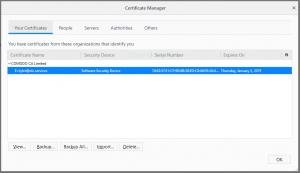
- Click the “Your Certificates” tab on the window that appears, then select the certificate in the pane (see below), then click “Backup…”
- Save a copy of the certificate somewhere one your computer. Remember where it is, as we’ll need it soon. Give it a good password. DO NOT FORGET THE PASSWORD.
- Now we have to tell your email client to use the certificate.
Using the Certificate
To use the certificate to sign or encrypt email, we’ll need to tell your email client to use the certificate. For Outlook 2010 and beyond, follow the steps below.
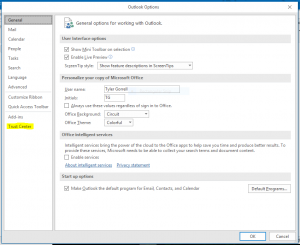
- Open Outlook, and click File, then Options
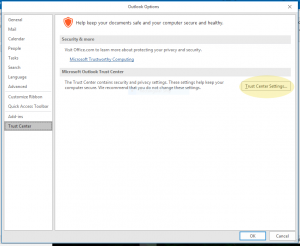
- In the Window that appears, click Trust Center
- Click the Trust Center Settings button
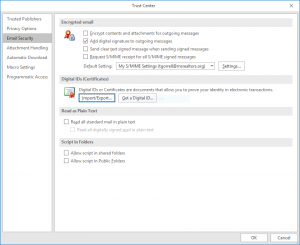
- In the next window, click Email Security on the left pane.
- Check the “Add Digital signature to outgoing messages box”, then click the Import/Export button
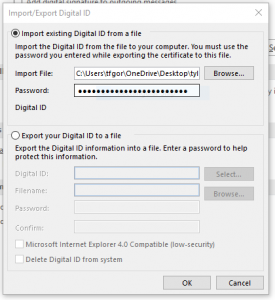
- Click the “Browse..” button, then navigate to your certificate that you exported from Firefox, select it, and type in the password you created. Click OK to finish the import.
Testing it out
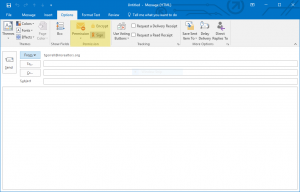
You should now do a test email to to see if your digital signature is attached to the email. Create a new email as normal, and then click on the Options tab at the top. You should see something like the following:
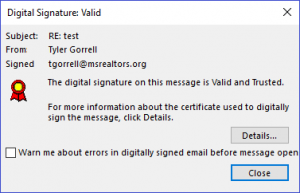
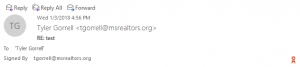
Your recipient will see something like this on the email header, notice the red ribbon:
If the recipient wants to verify the message, clicking the ribbon/seal shows more about the signature.